Note: This is part 3 of the discussion of amazing experimental laryngeal mask airways. If you have not read part 1, please click here to go to part 1.
Now let us return to Dr. Brain’s quest of trying to make the ideal laryngeal mask.
Trying out various cuff designs
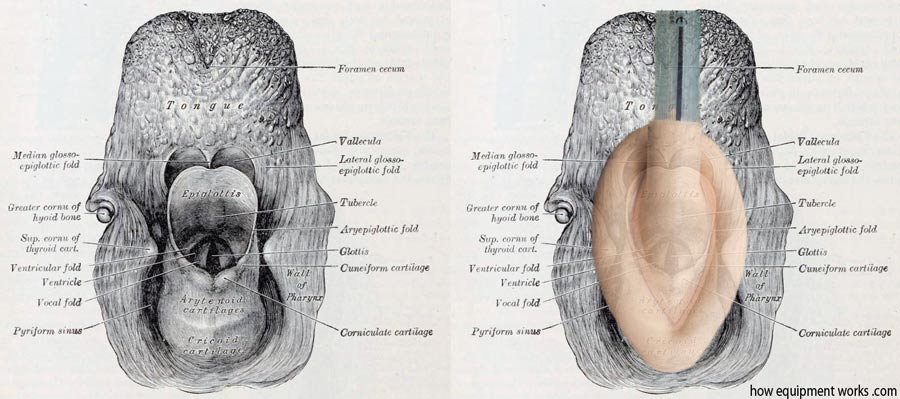
The pharynx has a complex anatomy as explained before with the flowers! Getting a cuff that is both easy to use and which also provides a good seal is difficult.
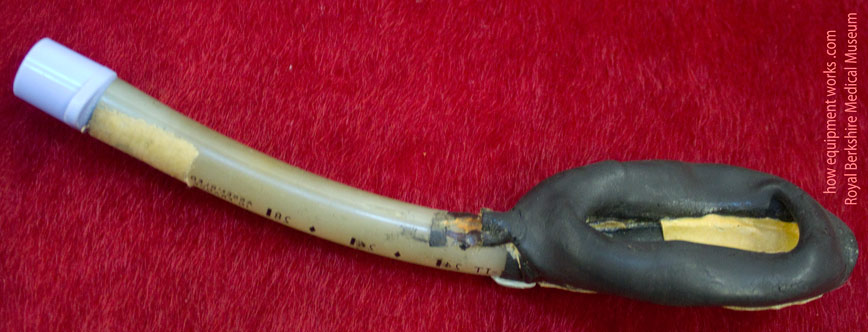
For example, Dr. Brain tried to make a cuff that had “exaggerated features”. It was specially designed in such a way that once it was inside the pharynx, it would apply equal pressures around it. Unfortunately, in the specimen below, the latex has hardened after so many years. Hopefully, you will imagine how it must have looked when inflated.
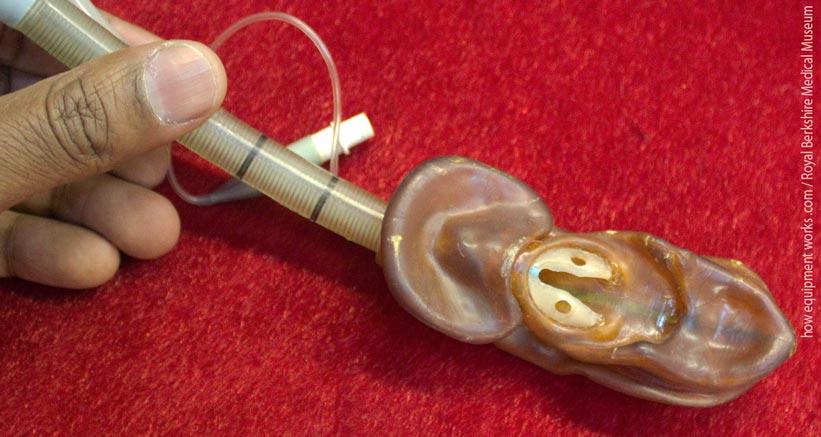
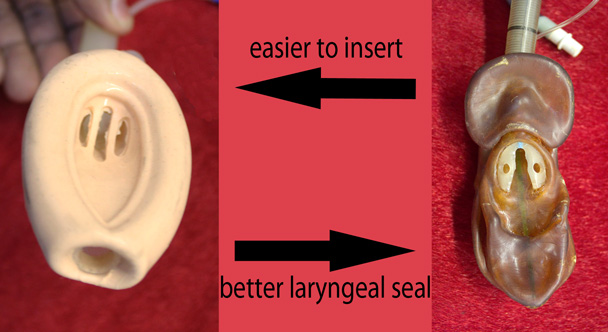
The exaggerated cuff design provided a very high-quality seal. However, the strange shape of the device made it difficult to insert easily, so Dr. Brain abandoned it. When designing the laryngeal mask, Dr. Brain had to often battle between various desirable properties.
Here is another experimental laryngeal mask. This one seems to have a cuff at each end! Can you guess what the other cuff is for?
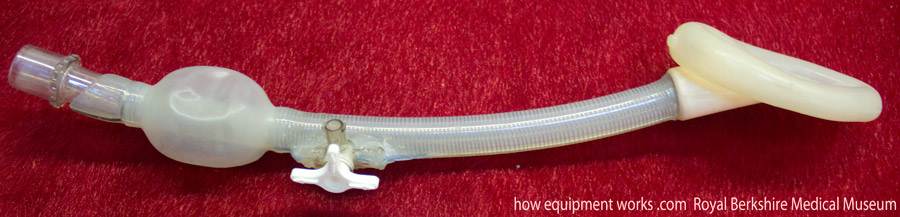
It took me a while to work out what this extra cuff does. This experimental laryngeal mask was designed for use in emergency situations, where you want to quickly inflate the cuff. Before your emergency situation arises, you would pre-fill your “reservoir cuff” ( arrows) with air using a syringe connected to the three-way tap.
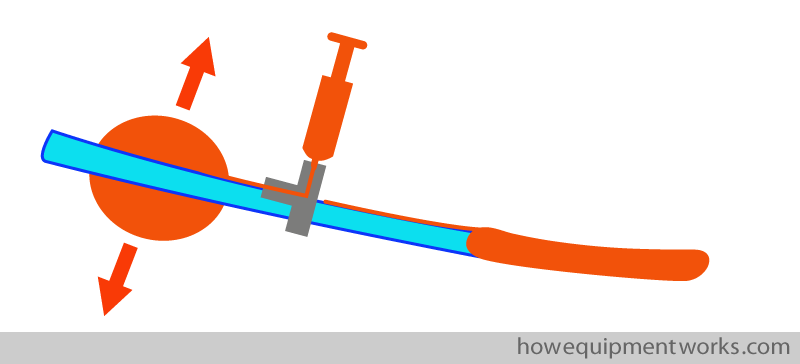
You then turn the three-way tap “off” and remove the syringe. The reservoir cuff now is under pressure with the air you inserted before. Your equipment is now ready for a potential emergency situation!
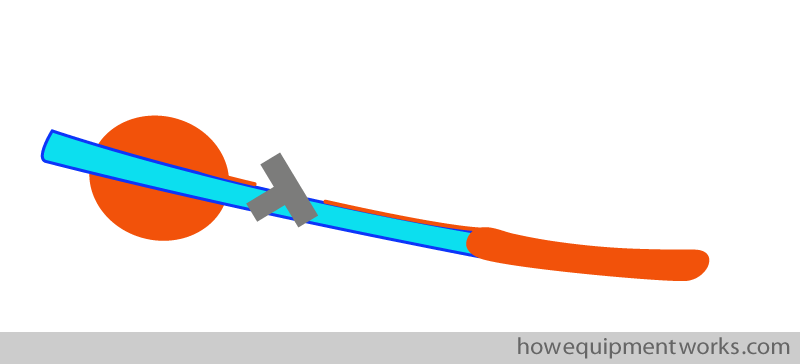
Imagine that your emergency situation has just arisen! You quickly insert the laryngeal mask and turn the three-way tap to interconnect both cuffs. Like magic, the reservoir cuff empties into the main cuff and your laryngeal mask is instantly inflated!
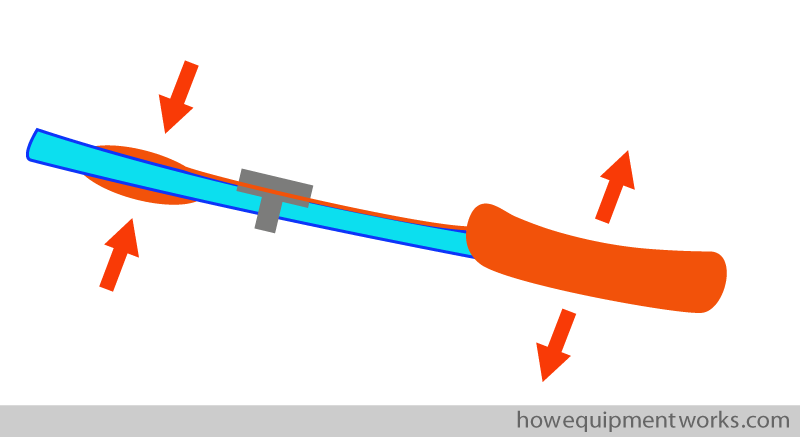
Here is another experimental laryngeal mask. This one was made to test how thin the cuff wall could be made. Again it involved a compromise. This cuff had a very thin wall and therefore was less traumatic to the airway. However, it was also prone to becoming folded during insertion and was also more likely to get damaged.
This cuff was made out of plastic (PVC). It was judged to be too rough and therefore was not used in patients.
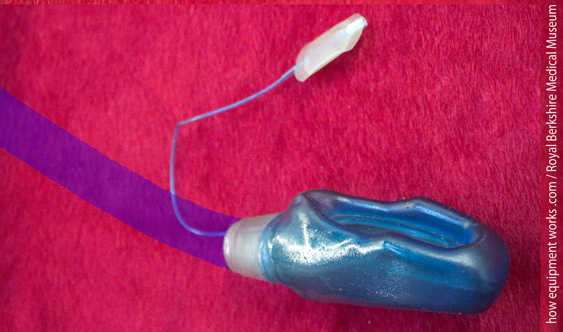
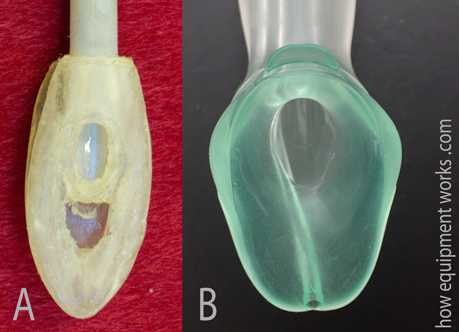
Many of you will be familiar with the “solid cuff” design seen in the device on your right (B). However, Dr. Brain, many decades ago, had similar thoughts. Below is an image (A) of a model of a potential solid cuff laryngeal mask that Dr. Brain made to see how it might look. The design of this device was not taken further and of course, at that time, the choice of materials available was limited. If such a device were to be made, it would most likely have been made out of a material called “silicone rubber” ( a type of silicone that has good thermal stability and flexibility).
A small note: This is not the “official” history of the laryngeal mask!
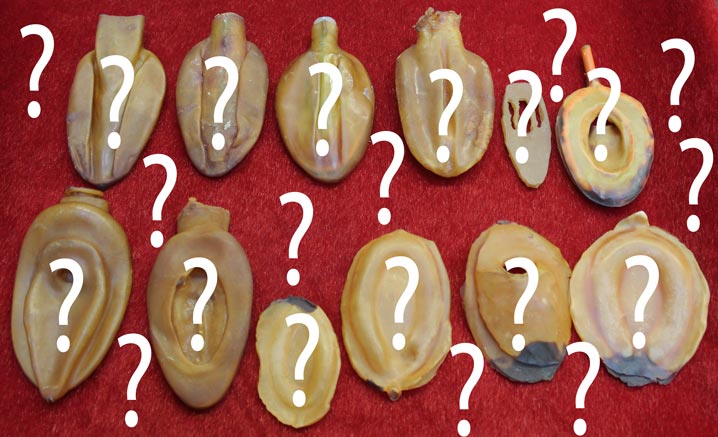
It is important to bear in mind that the material on this web page doesn’t tell the full history of the laryngeal mask. I am only giving you a brief glimpse of it using the experimental versions mostly housed in the Berkshire Medical Museum. Dr. Brain Brain spent years and years making many more designs than I have shown on this website. For example, after the first commercial laryngeal mask was marketed, he made about a further 300 experimental laryngeal masks. So there are many bits of the history that I have left out!
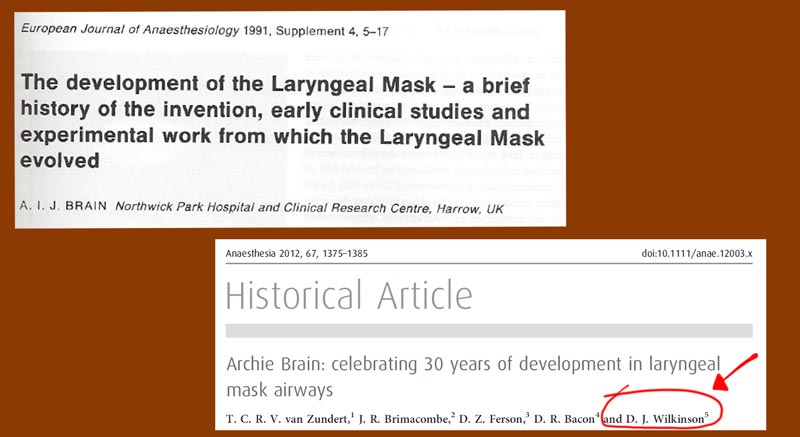
If you would like to know a more “official” version of the history, please read it from a reputable journal. I think the article (see below) written by the senior author Dr. Wilkinson should be free to download from the Anaesthesia Journal website (please let me know if it is not). By the way, some years ago, Dr. Wilkinson anaesthetised me and I rather embarrassingly remember how, as I was falling asleep, telling him to make sure he was giving me enough anaesthetic! He is a very gracious gentleman and didn’t talk about it afterwards in the recovery area.
Let us now continue seeing some more fascinating experimental laryngeal masks.
Trying to increase the cuff seal pressure
When a face mask leaks, one can apply more pressure using your hands to make the seal better.
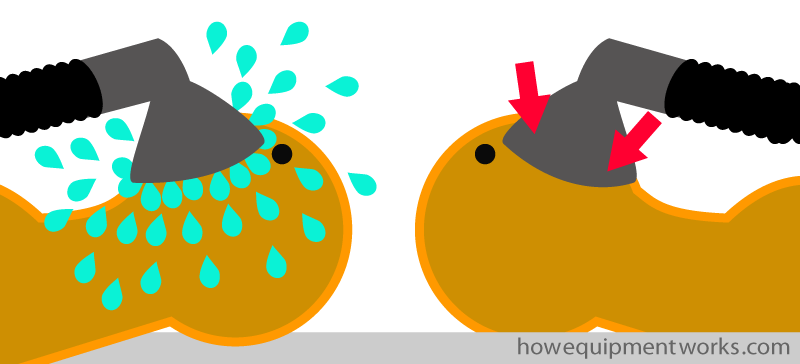
When a laryngeal mask leaks, one cannot put ones hands in (however small they may be !) to press it against the laryngeal opening!
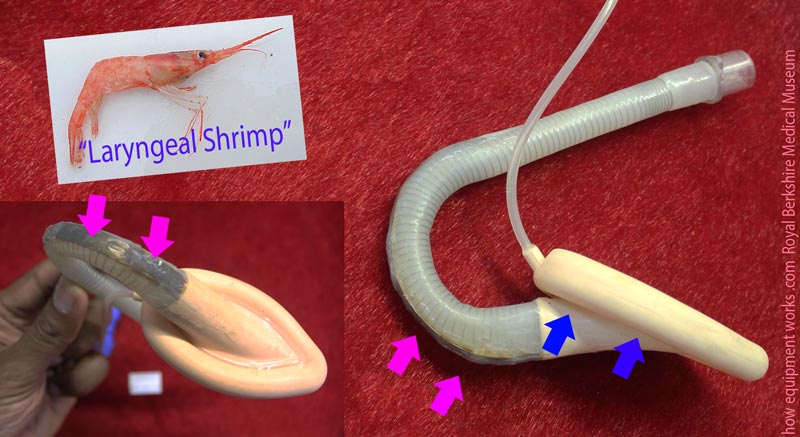
Dr. Brain explored various solutions to this problem. The experimental laryngeal mask shown below is shaped like a shrimp and Dr. Brain therefore called it “Laryngeal Shrimp”. The laryngeal mask tube had a curved spring (pink arrows) that, when the mask was inside the pharynx, would apply pressure onto the mask.
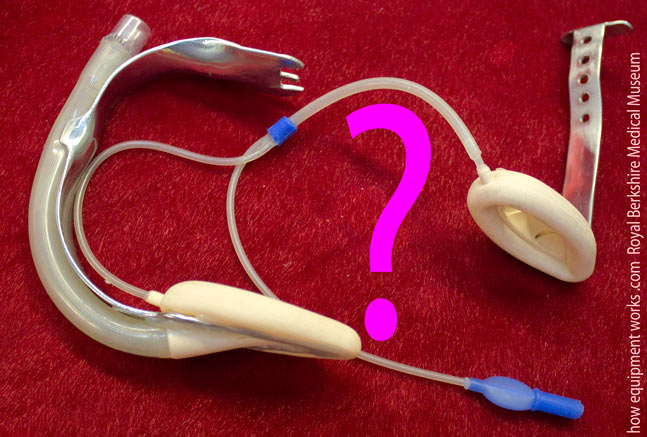
Here is a very interesting experimental laryngeal mask! Can you guess how it works?
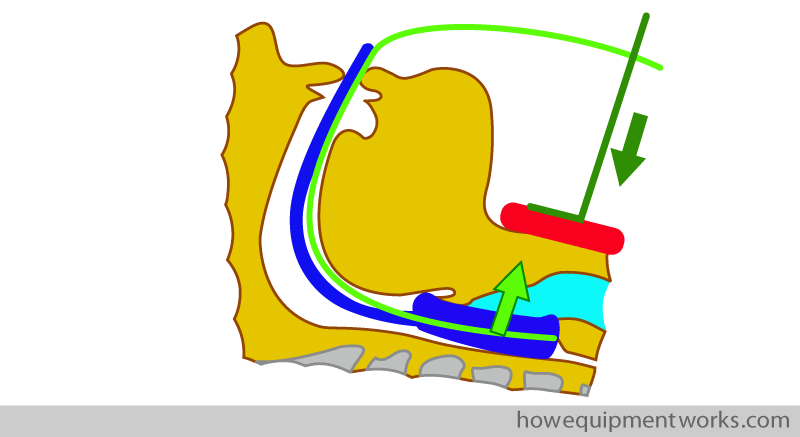
In this device, the red cuff (see image below) presses on the neck, pulling the blue cuff towards it via the metal supports (green lines). This would result in a very high-pressure seal. However, Dr. Brain was not willing to proceed with this idea because he felt it could apply so much pressure as to damage the airways, and therefore it was never used on a patient.
Here is another photograph of the actual device. When I first saw it, I just couldn’t work it out!

Do you work in the anaesthetic team? If you do, please visit the free website below, which has anaesthesia-related fun and safety material. Click the button below to visit.

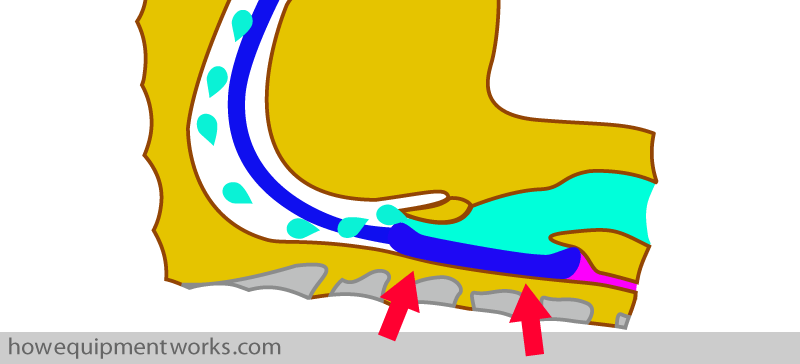
Another idea Dr. Brain explored was to have a posterior cuff (shown in pink below), which was an extension of the main cuff. When this posterior cuff expanded, it would push the laryngeal mask towards the laryngeal opening to give a better seal.
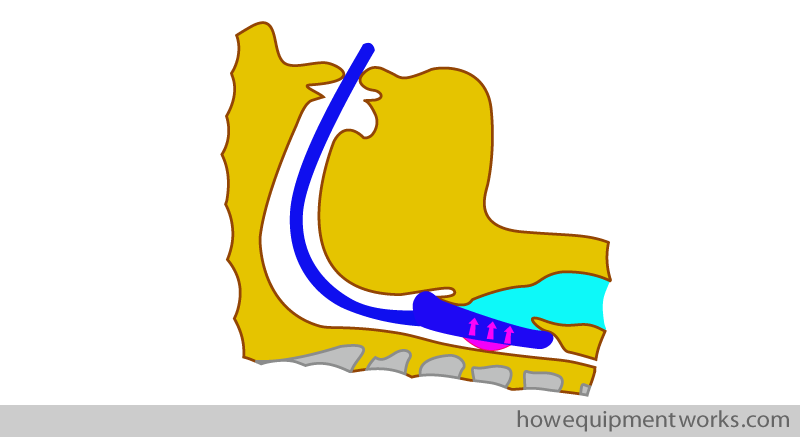
This is a somewhat grainy old image of an experimental laryngeal mask showing the posterior cuff.
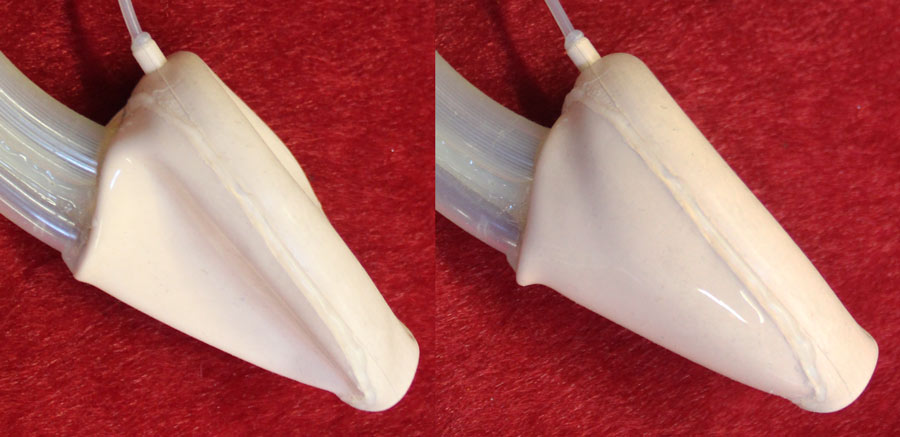
Below is another experimental laryngeal mask which has a more streamlined posterior cuff. This design achieved a very high-quality seal ( allowing positive pressure ventilation using pressures up to 50 cm H2O).
Teaching
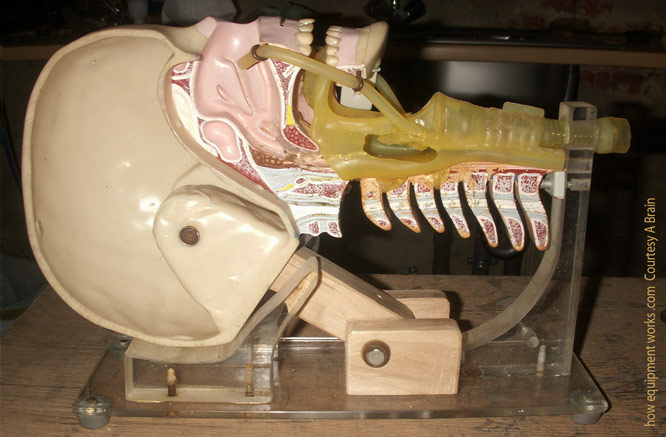
Dr. Brain not only kept working on new laryngeal mask designs but also spent huge amounts of energy and time ( 22 years) teaching the world how to use them properly. Even his teaching methods were associated with inventions. Dr. Brain was not happy with the standard dummies used for airway training. So he sawed one in half in order that one could easily see the airway ( see image below). The heavy base was replaced to make it more compact so that it would fit his briefcase. This head has been to many coffee rooms all over the world, where Dr Brain used it to teach trainees the correct techniques of laryngeal mask insertion.
The problem of the epiglottis
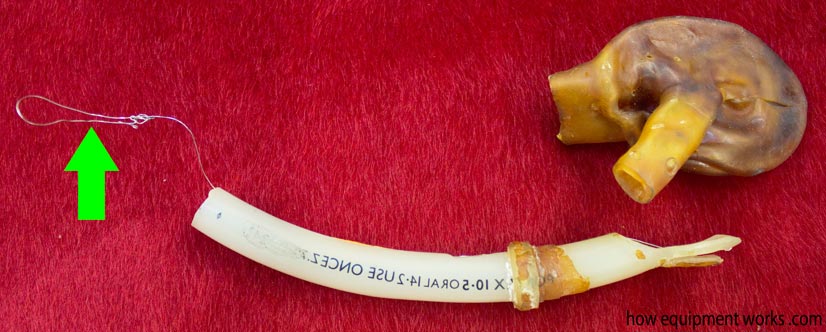
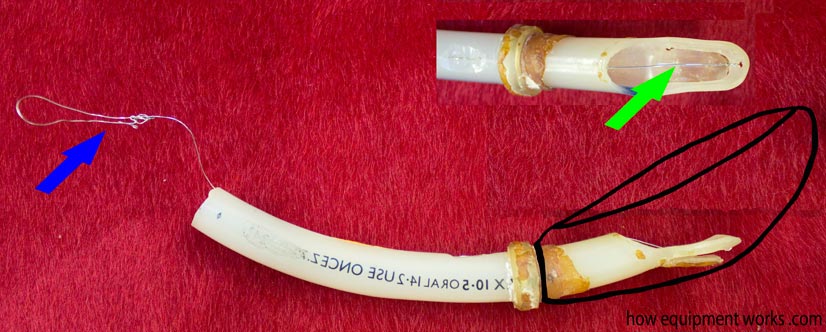
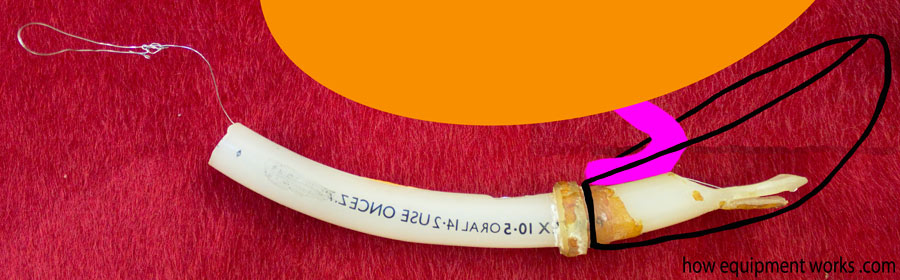
Here is another mystery device. This was made out of latex ( a natural rubber material) and therefore has deteriorated quite a lot. The big brown thing is the remnants of what was then a cuff. However, the magic in this experimental laryngeal mask lies in the tube. At one end is a wire (green arrow). Can you guess what would happen if you pulled the wire?
To understand what the above weird device does, I need to first introduce you to a problem that laryngeal masks have to deal with. As you will know, we all (well hopefully all of us) have an epiglottis and this is shown as the little red area in the pharynx below. The epiglottis prevents food (shown in pink) from going into the trachea as we drink or eat something.
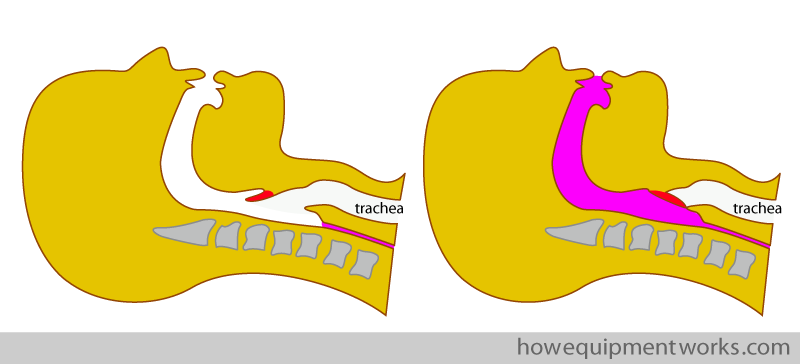
For the laryngeal mask, the epiglottis can become a problem. It can fold into the cavity (bowl) of the mask and cause obstruction.
Now let us see how the weird experimental laryngeal mask attempted to deal with the epiglottis. I have tried to reconstruct the cuff, which I have outlined in black. The wire loop (blue arrow) goes through the tube and is connected to the tip (green arrow in magnified image).
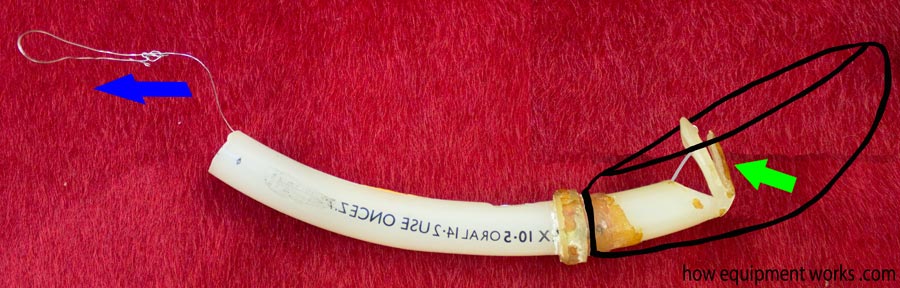
Since the wire (blue arrow) is connected to the tip, when it is pulled back, the tip bends.
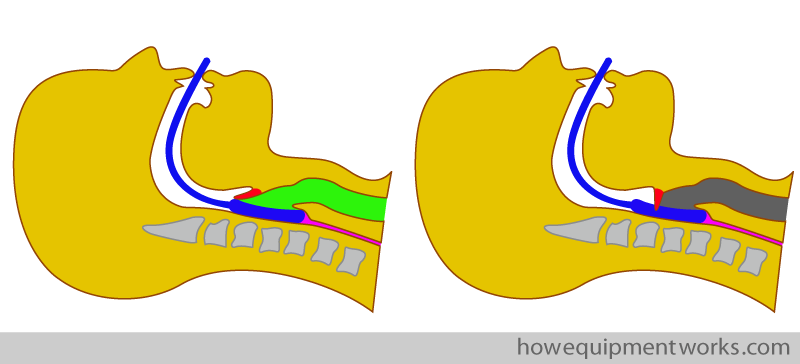
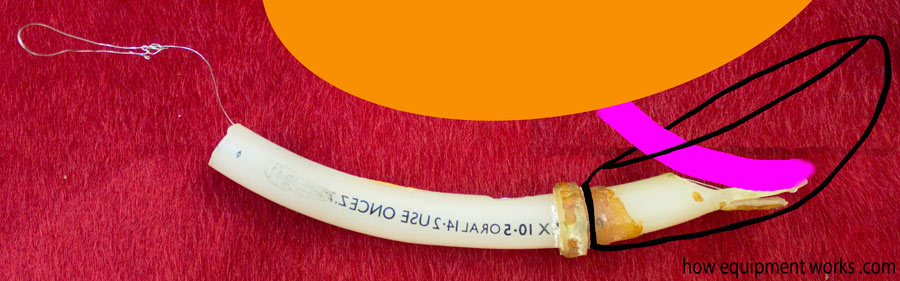
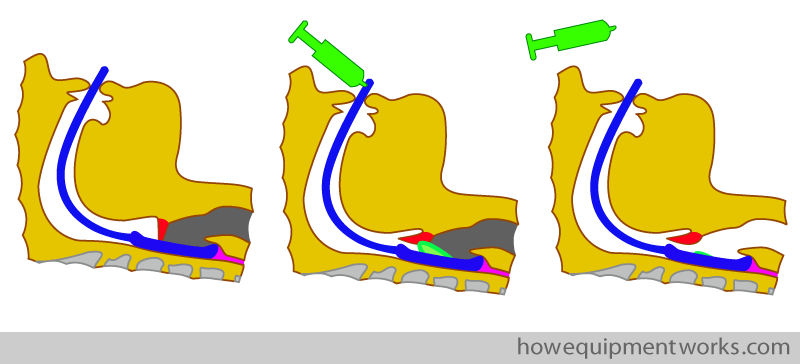
Let us imagine that you have inserted this experimental laryngeal mask and you suspect that the epiglottis (pink object) is obstructing the airflow
Just pull the magic metal wire and the epiglottis gets flipped out of the way!
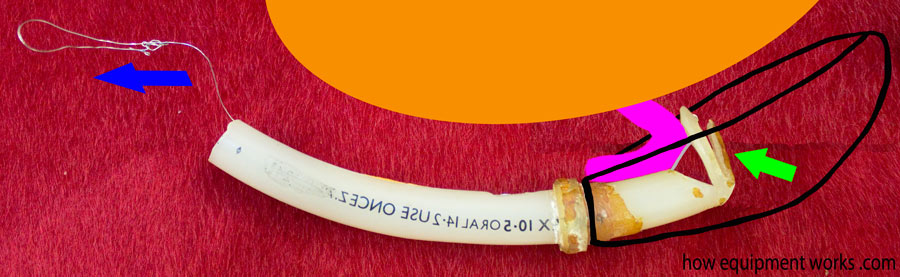
When you release the wire, the tip flips back. However, the epiglottis remains folded away and you now have an unobstructed laryngeal mask!
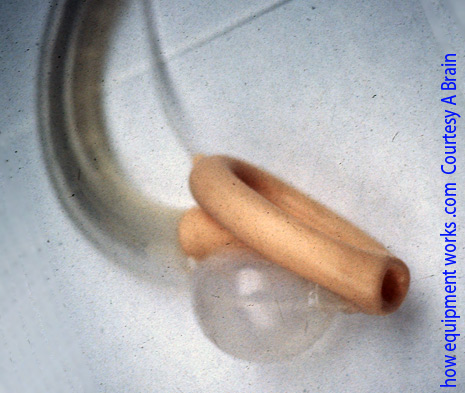
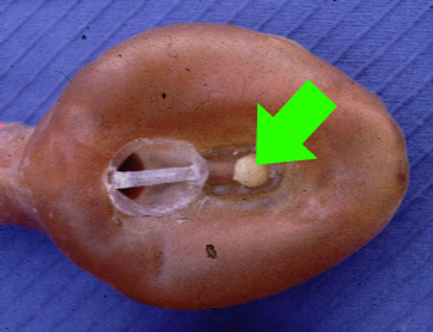
Another idea Dr. Brain tried was to use a balloon in the cuff to lift the epiglottis. Below is a latex experimental laryngeal mask showing the little balloon (green arrow).
In this case, if the epiglottis were blocking the air path, the little balloon (shown in green below) would be inflated. This balloon would then push the epiglottis away, clearing the airway. Dr. Brain did not pursue these means of pushing the epiglottis away since under certain circumstances, the epiglottis could be harmed.
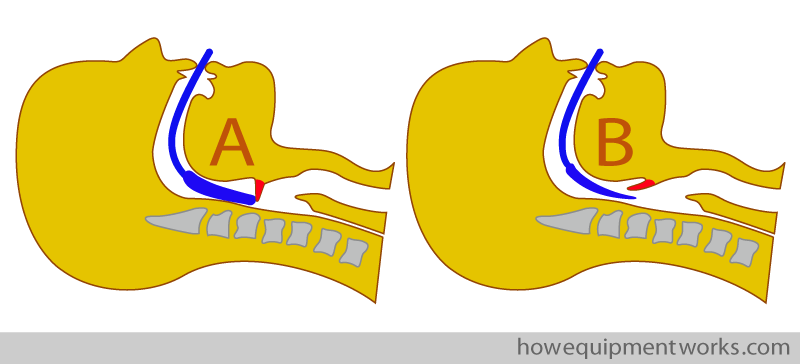
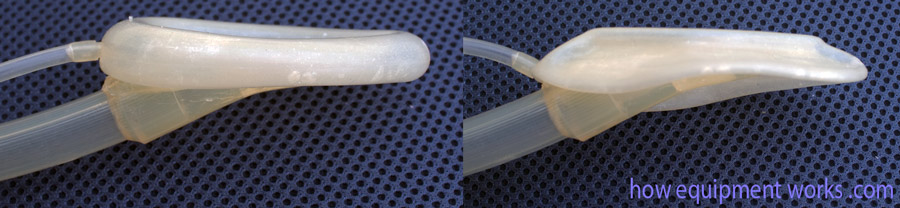
A relatively simpler solution was to design laryngeal masks that had a thinner insertion profile. During insertion, “thick” laryngeal masks ( diagram A ) are more likely to “hit” and fold an epiglottis. This is less likely to happen when inserting laryngeal masks that can be deflated into a thin wedge shape ( diagram B ).
The initial black rubber Goldman mask cuffs were quite thick and difficult to make slim for insertion.
The silicone Dunlop cuffs on the other hand could be deflated to a very thin shape, making them easy to insert and less likely to snag the epiglottis.
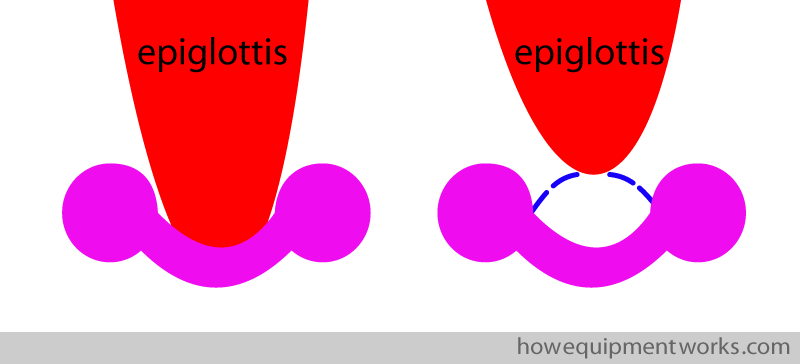
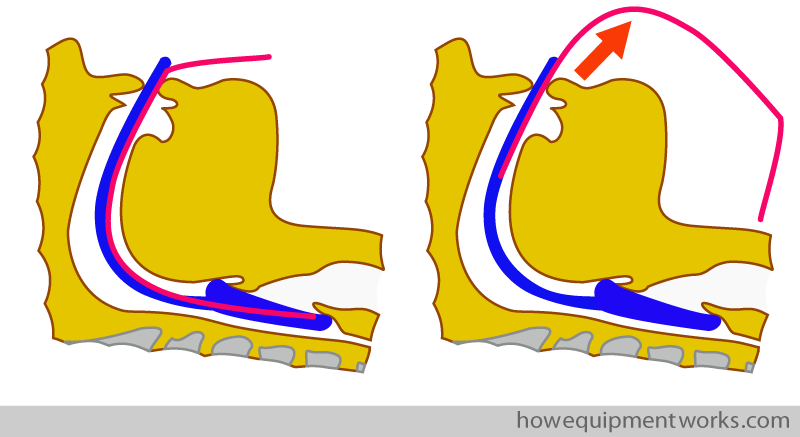
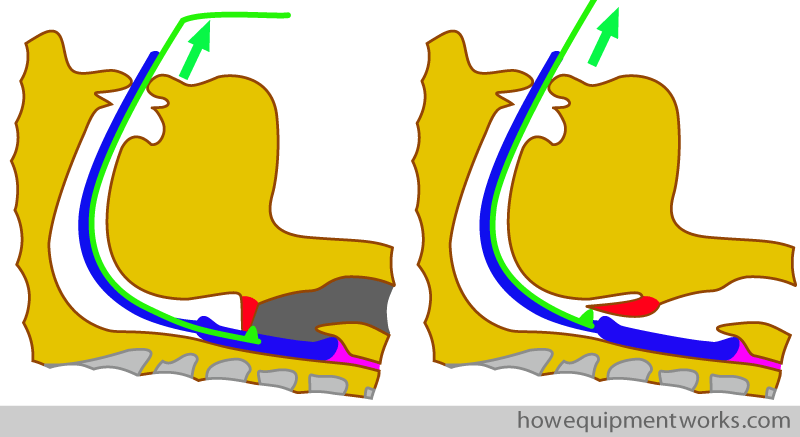
Another option Dr. Brain considered was to “hold up” the epiglottis using an arch. In the image below, the cross-section of the cuff is shown in pink. On the left, the epiglottis has fallen into the bowl of the laryngeal mask and is blocking it. The image on the right shows how an arched structure could hold up the epiglottis, preventing it from blocking the laryngeal mask.
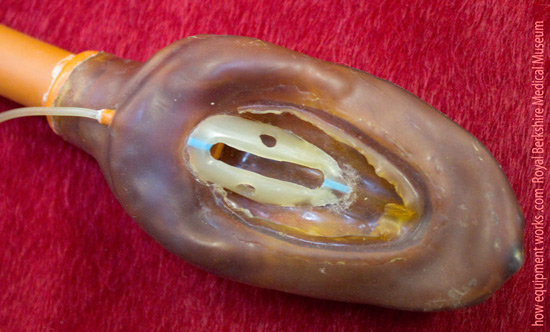
Here is an image of a real experimental laryngeal mask with an arched design to hold up the epiglottis. However, he was concerned that the holding up of the epiglottis would be traumatic and therefore this was never used in patients. The cuff in the museum specimen shown below was made of latex As you can see, this has hardened over the many decades since it was built.
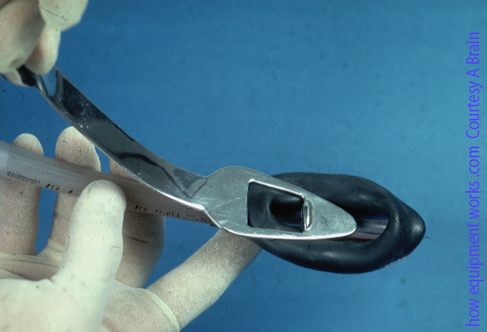
Dr Brain tried another approach to solve the issue of getting the epiglottis out of the way. At that time, there was something called an introducer tool that was being trialled. When laryngeal masks were inserted, there were times when it would fold. This tool was designed to make insertion easier with less folding.
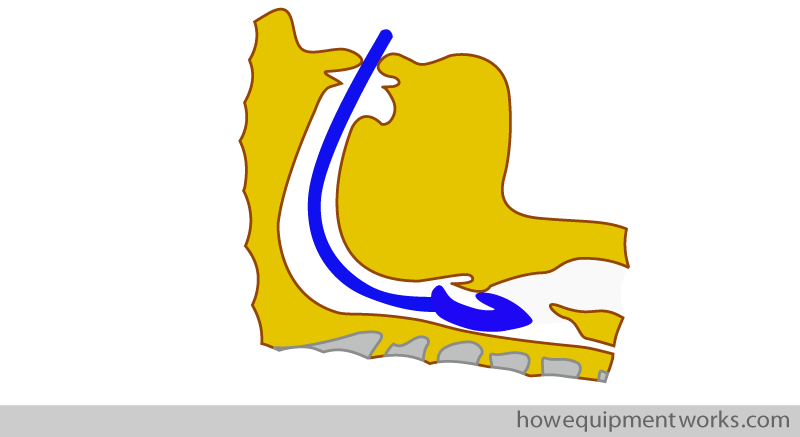
The introducer tool was made out of metal and was inserted into the mask to make it stiff.
The laryngeal mask along with the introducer tool inside would be inserted and because it was now rigid, it would resist becoming folded. Once the laryngeal mask was properly seated, the introducer tool would be pulled out.
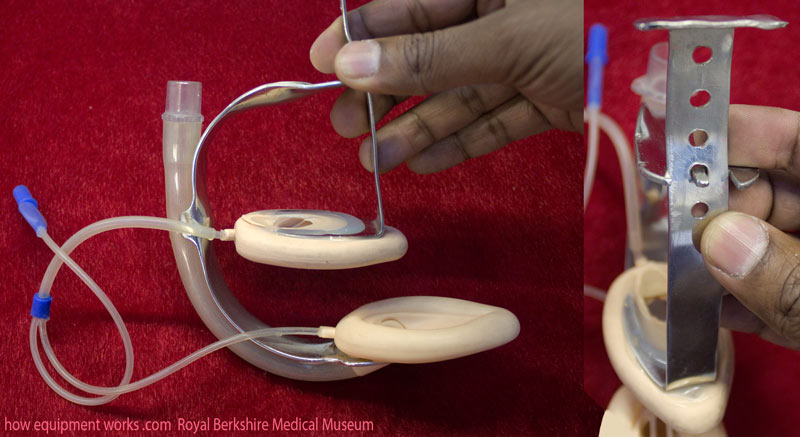
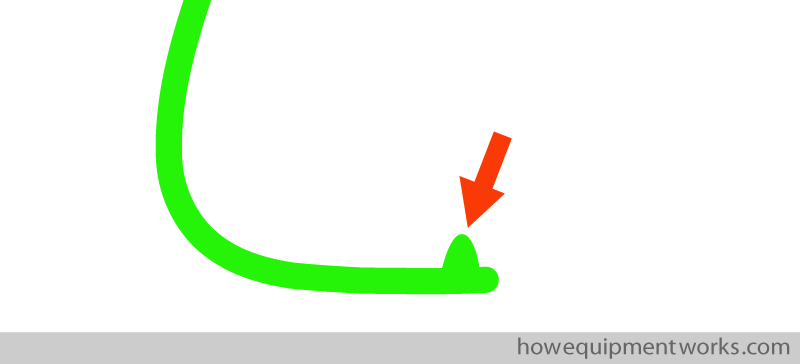
To solve the epiglottis problem, Dr. Brain modified the introducer tool so that it had a bump at the end. Like a lot of things on this website, the bump shown here in an exaggerated form.
Here is an actual experimental laryngeal mask showing the bump. I will soon explain how this”bump” works.
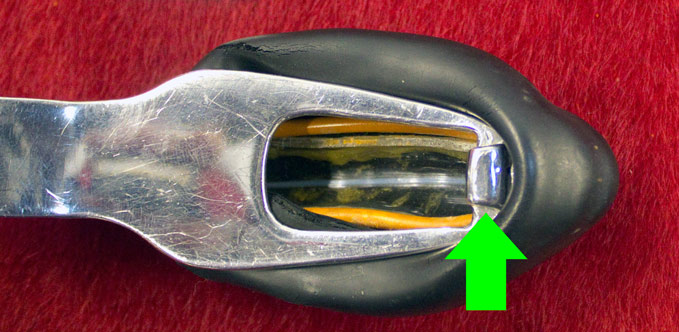
This modified insertion tool was inserted in the same way as described before.
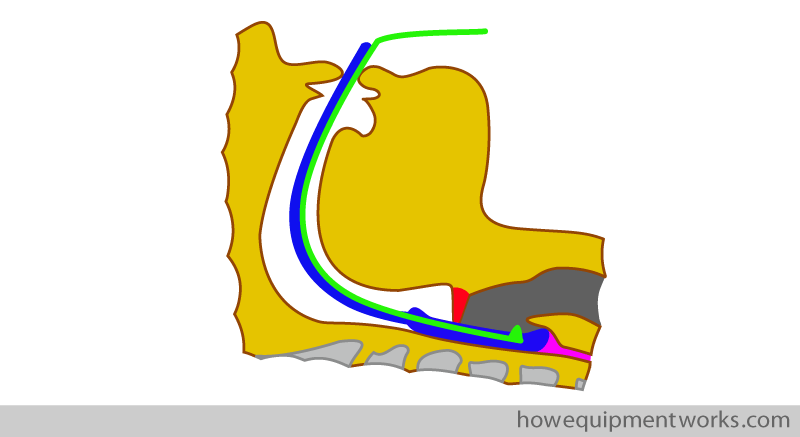
As the modified introducer tool would be removed, the bump on its end would pull the epiglottis away, preventing it from obstructing the mask opening. While this tool was successful in moving the epiglottis away, Dr Brain felt that if it was not used carefully, it may traumatise the epiglottis, and therefore the idea was abandoned.
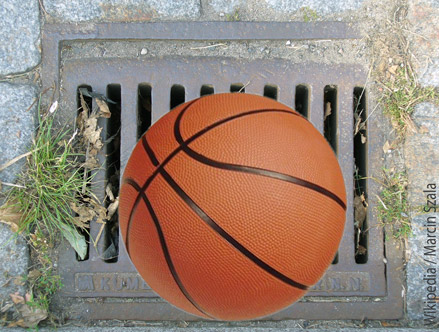
Another solution to the falling epiglottis was to use epiglottic bars. The concept is similar to water drains that you see in your street. Such drains have bars that allow the water to pass through but prevent large objects from getting in and blocking the flow. Similarly, the bars of a laryngeal mask allow the gases to flow but prevent the epiglottis from blocking the pathway.
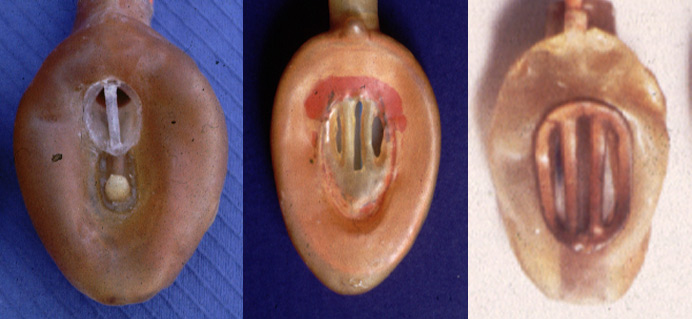
Here are some early epiglottic bars seen with latex cuffs.
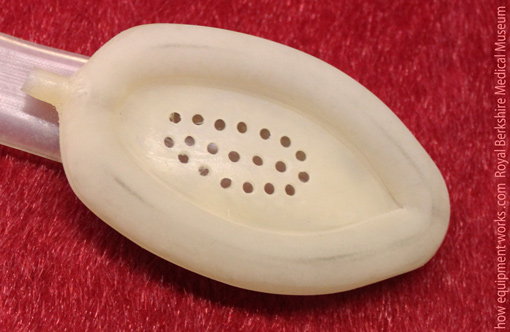
This early silicone experimental laryngeal mask had small holes instead of a grill. It was never used as it was very likely to get blocked with secretions.
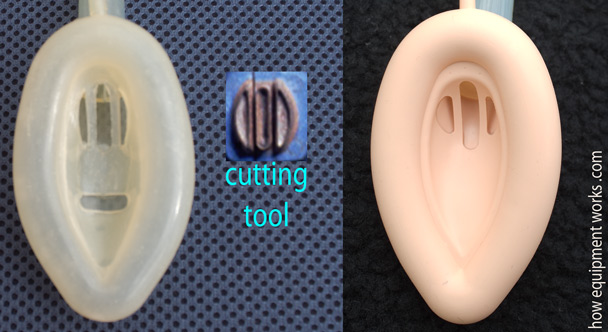
Dr. Brain found that it was relatively easy to cut the epiglottic bars in the silicone Dunlop cuffs (shown on the left), using the cutting tool shown in the middle. This led to the modern design shown on the right.
Please click the “Next” button below to read the final part of our discussion on amazing experimental laryngeal mask airways. Thank you.